Friday, December 18, 2015

Just saw Star Wars

Let me start by saying that I am not going to spoil anything. 

I just got out of seeing Star Wars Episode VII The Force Awakens and made myself the celebratory dinner you see before you (Sarnac Caramel Porter not pictures). It is going to take me a while and many subsequent viewing to fully digest it (the movie not the food). In the true since of this blog, I am going to say two to three things that I liked and two to three things that I didn't like. 

The cinematics are great for the long shots, there are a number of callbacks and fan-service and lots and a very strong female protagonist. There are lots of sweeping long shots of exotic places that Star Wars may not be particularly renown for but were certainly impactful. Scattered about are little things that will make fans of the original three films happy. They are all pretty obvious but made me laugh. The heroin don't need no man to save her and kicks all the butt while the boys are looking for their glasses on the ground. Finally, holy crap holy OMG WTF! Why are you reading this and not watching it?!?!?!?

Monday, November 9, 2015

Final Fallout 4 Countdown

I am doing some of the final work on my computer getting it ready for Fallout 4. Part of that is checking how my rig fairs against the recommended system requirements. I wanted to build a computer with the expressed goal of playing Fallout 4 and bought the best computer that Dell could build with few exceptions. The system requirements were not out until very recently.

I did some checking and my system stacks up pretty well. I should be able run Fallout at 1920x1810 pretty easily. That is good because that is about the highest resolution that my poor old eyes can take.

The main bottleneck is my GPU which is sad because I have a pretty sweet GForce GTX 960. There is a gaming version with twice the memory. In retrospect, I wish I could have bought the stock GPU and then upgraded to the Geforce 960 4GB later. I think that this upgrade will have to happen eventually to play upcoming games.

My painting station and computer station is in the basement and the light down here is not good. There are several fluorescent bulbs handing that provide harsh light. When I turn them off, I can't see my keyboard or what is on my desk. To solve this, I bought a $10 USB light with a dimmer and used an old USB extension cord. I positioned the light in such a way that it casts light on my keyboard. Pretty cheep solution. It balances pretty well with half of the keyboard on the USB extention and the other half on my painting station.

Saturday, November 7, 2015

Fallout Enbargo

The only thing that I want for x-mas
Up until now, my habit is to look for Fallout news and videos every day. I have been reading Reddit habitually as well as the boring official stuff from Bethesda. Until earlier this week, I would have said that there were few people that better informed than I in Fallout news.

There were some leaked photos from a Spanish gamer this week and that was the first unofficial leak. Most of the pics were hi-res and of things like Dogmeat or buildings. I didn't think that anything could be spoiled this soon but I was wrong.

Soon after that leak came many more. I watched a few videos an immediately ran into quest spoilers. In an effort to play Fallout 4 unspoiled, I have sworn off any Fallout news until after the game drops.

Friday, October 30, 2015

Played a game, short update, rant

Have done zero painting since the cultists. Sorry, Greg. I am not painting my stuff either.

What I have been doing is playing lots of X-wing. Mostly with my buddy Charles who I got into the game but also once with a very good player Dan. For the most part, I have been having a great time. The games are fast (about an hour per 100 points) and brutal. 

Tuesday, October 13, 2015

Pipboy? Schmipboy!

I did not find out about the Pipboy Edition of Fallout 4 until long after it was sold out and on eBay for 3 times the price. I love the idea that I'll be able to use my mobile device as a second screen but am not going to go out and drop $500 on a giant plastic Pipboy. Instead, they are a myriad of iPhone holders out there and a few just for forearms. 

I picked this up for $9 shipped from China and love it. It fits my giant iPhone 6 Plus perfectly. What I like most about it is that the phone attaches to the arm thing with Velcro so I can position it at an angle that is easy for me to read on the fly and type on. 

This month is killing me. I think we are 26 days out now and each one is grinding by. The worst are my days off. At least at work things fly by but when I am at home I have all the time in the world to think about Fallout 4 and obsess over every SPECIAL video and perk analysis. 

Monday, October 12, 2015

Einem Nukacola, bitte.

I DLed Wolfenstein: Old Blood to use as a shake down for Fallout 4 on the new computer. I am glad that I did. There is a flickering screen problem that people with Nvidia cards have when running some games on Windows 10 and I am one of those people. The current fix is to run the game in a window, but there are more detailed fixed that I am not quite brave enough to try.

Other than that, the games works amazing. I will try to use it and Adventure Capitalist to distract me over the next 27+ days until my game drops. I feel like am I in a perpetual X-mas Eve. This state of arousal is exhausting. It has eroded my interest in anything else.

I feel like even when Fallout 4 drops, I'll still be sucked into a world without 40k or painting. I'll do my best to make posts about what I am doing in Fallout, but those are less interesting and kind of off topic for this blog. On the other hand, off-topic content is better than no content at all.

On a cute side note, I did find a little Easter Egg from the detail-oriented folks at Bethesda. It seems that they could not help but to cross the streams between Wolfenstein and Fallout. Unfortunately, this is just for fun an in no way means that the worlds could be the same as Nukacola was invented in 2044. That's about a century too late to be in the Wolfenstein world.


Wednesday, September 30, 2015

Fallout 4 has a new home

And that home is my new Alienware X51 R2. I know, I know. I am a big ole nerd and should be able to build my own computer. 10 years ago that might have been true but technology has gotten away from me in the last decade. I no longer recognize any of the names or tech. I could have gone to a site like NewEgg and built my own but that never really worked out for me in the long run. All the PCs that I built crapped out in a few years whereas the Dell that I bought in 2004 is still chugging along. I know that I paid about $400 more for Dell building it for me and for that sexy little alien head. It came down to security and stability (things that get increasingly more important the older you get).

At the time of posting this, Bethesda has not released any of the system requirements for Fallout 4. This site has speculated on what they might be so I bought a computer that was one better than everything that was there. I don't what the difference between an i5 and and i7 processor but I know which is more expensive now.

There is a speculation that Fallout 4 might have lower system requirements than expected. that would be similar to Fallout 3 which ran on my outdated system at the time. Granted, the draw distance was rather short for critters and grass, but it ran and the experience was pleasant enough.

Saturday, September 19, 2015

The X-Wing collection grows

Part of the reason for the drop off in posting frequency is the excitement for Fallout 4. I spent the last month playing through Fallout 3, Fallout: New Vegas and now Skyrim. In each case, I stated a new character and played from scratch. I know those games so well, that I hit the highnotes and got to a place were I was a walking god looting the watelands with impunity and also with no greater purpose. It is the methadone to the china white that I hope Fallout 4 will be. 

Also very distracting is X-wing. After buying the starter set I bought what you see in the picture for about $100 which is about half retail from a nice guy locally. 50% is what I like to pay for things that are not new and it seems that the bottom has fallen out of early-wave X-wing stuff. 

Thursday, September 17, 2015

Finished - Broodlord

Stick a fork in him! I should have made that the tag for these posts rather than "finished." I could probably figure out a way to change the names but I am scared that I'll just erase all the tags that I have applied. 

I like almost everything about how this guy came out. I am confused at one thing. Why is he not symetrical? On his left side the human hand is in the front and the claw hand is in the back. It is the opposite on the other side. Seems strange. I tried to reverse it and the mini did not fit correctly. 

I should do a post about all the Space Hulk Genestealers when I get them all finished and I hope that I remember to. Currently there are 9 and the Broodlord finished and 13 remaining from the box. I bought 8 more to field an Apocalypse formation of Vanguard Infestation of 3+ Genestealers and 3+ Lictors. Currently I have all the minis save for one Lictor which I am looking for currently in metal only. 

It is a long road from here to there though. 


Up next I am working on the 30 Cultist project and the custom Lord of Change from Greg. I think I have been bitten by the Slaanesh bug and am thinking about expanding my Noise Marines. 

Wednesday, September 16, 2015

On the table - Broodlord

I am sorry that I did not get more in-progress pictures of this mini but it was basically done when I came back to it. Sometimes I have time for painting and sometimes I have time for Blogging. Rarely do I have time for both. 

The Broodlord was painted in the same style as the rest of the damn dirty bugs, only I spent more time on him. The details are a little more fine. The pile of skulls got some extra love too. Perhaps too much. I went a little crazy and was not paying enough attention to the wash pooling. There are areas where detail was erased by too much wash. I am mostly ok with it as it is only on the base and only in places where the shadows are. 

He just needs a little more detail on some of the arms and assembly and he is finished. 

On the table now - More Khorne Cultists

After finishing my test mini, the next step in a big project is getting the recipe down and speed up the process. 

The minis begin by being sprayed black and then basecoated brown with Mournfang Brown. It takes two passed of overbrushing to get a solid brown coat. I have to be careful not to let the paint pool or it will ruin detail. An advantage of basing the minis brown is that the client also wants the base painted and drybrushed in brown tones. Twofer. 

The red cloth gets a basecoat of Khorne Red and then washed in Agrax Earthshade with everything else. 

Monday, September 14, 2015

Finished - Three Genestealers

I am trying to clear the painting table of any projects that are sitting in limbo. I had a Broodlord and these three bad boys basecoated and waiting for wash and detail work for ages. Wash and touchup went great but I really stalled out on the detail work. 

I made an intentional choice not to highlight the skulls, metal and helmets as much as I normally do in an order to make them not overpower the main body. These minis are very dark overall and a bright red helmet would draw attention away from the killing machine. For the Skulls, my final color was Rakarth Flesh. For the red armor the final highlight was Evil Suns Scarlette but only in very small amounts. I left the green lenses as Knarloc Green and did not do any countershading or reflective dots. 

I spent so much time learning how to do those techniques and how to do bright highlights and tho choose not to use them for effect is a strange feeling. Less is more is not really my style but I am happy how the minis came out. 

Friday, September 11, 2015

Finished - Khorne Cultists

This is the finished product for Greg at Cranky Old Gamer according to his wishes. I am not super-happy with how it turned out as it appears too dark for my tastes. I like high contrast minis with bright highlights and black shadows. This mini has mid-tone highlights and brown shadows. Not my taste but that is what the client requested. He seems happy with it. 

In return for one beautifully converted Greater Daemon and one rehabbed Greater Daemon, I have to paint 30 Khorne Cultists. That is a lot for me but I am happy to do it for the awesome work that I received. I could not have done half as well myself and for that I am grateful. 30 Cultists grateful. 

At this point I just need to streamline my process. I did one, now I am doing three. I am going to try to do the 5 at a time until they are done and then mail them back to Greg with my next project. 

The "Paint for Minis" program is just like turns in 40k. On my turn I feel like I am king of the world, but on my opponent's turn, I feel like I am on the firing line. When Someone else is sculpting or giving me minis, I feel like a king. When I am painting, I feel like a slave. (No judgement, Greg. I love our arrangement). 

So far, I have had very little luck getting people to pay me for already painted minis on BT. Seems that people want custom painted minis instantly for half of what they would pay retail. 

X-wing Starter Set

When there are long lapses in updates, it is usually because I have fallen into a video game or am moving across the country. I have been playing a lot of Bethesda games lately as the excitement for Fallout 4 ramps up and once that drops, you might not hear from me again until 2016. I might have to start posting what I am working on and screen caps in lieu of painting posts. 

I also picked up X-wing today. Now I am about 5 years behind the cool kids on this one so I have a lot of catching up to do. There is not really a painting aspect to this game but you know I am going to get a book on Star Wars fighter markings and make each ship unique. 

I have yet to get my first game in and am already looking at building a large force and getting them in foam. There is a pretty good crew out here that plays and I think that I hooked a 40k player into trading portions of a Starter Set with me. I think he is set on playing Imperials so that leaves me with the Rebels. I think that fewer and more forgiving crafts will suit my play style but I sure do like the look of the advances Imperial craft. 

Saturday, September 5, 2015

Finished - Badrukk

Holy cow this is deceptive mini. You look at it in the books or even when it is painted and think, "Yeah, no big deal." Painting it is a whole different story. 

I made a few choices when painting it to adapt it to my painting style. The 'eavy Metal kids painted glyphs on all the metal plates and that was way outside of my skill. I dislike freehanding because it is too hard touch up later. What I opted for was painting the plated a solid color and then drawing on glyphs with a 0.05 pen later. 

The Badrukk in the Codex has a treasure map painted on his loin cloth. While that is thematic, fluffy and bad ass, it is outside of my skillset. I just painted it simple and brown. While this is a lot less fancy, it also does not draw attention away from the other detailed areas that I did paint well. 

I chose a simple color scheme for the mini and stuck to red and yellow as accent colors. I did this because I didn't want to turn him in to an Orky rainbow. Also, these are two colors that I am more comfortable with and they contrast well with the green skin. 

Wednesday, September 2, 2015

Finished - Custom Keeper of Secrets

In return for painting a big ole pile of Khorne Cultists, My buddy Greg over at CrankyOldGamer converted me up a a custom Greater Daemon of Slaanesh, the Keeper of Secrets. I supplied the bits and he did the converting. He also did a bang up job taking my idea and running with it. I was going to use the weapons from the Daemon Prince kit but Greg swapped them for the swords from some weird Dark Elf WFB kit. I sent the trygon tail but Greg wisely changed it to the Hive Tyrant tail. He put together a better conversion than I could have. 

As far as painting, I tried to paint it in the same scheme as the other Daemons of Slaanesh that are already finished and to a lesser extent the Noise Marines. For the Daemon Princess, I swapped the pink skin and black armor for each other because I am better at painting black than the weird pink that the Slaanesh minis have on them. I decided to keep that theme going as this would have been a LOT of pink skin to paint. 

Sunday, August 23, 2015

Krylon, I am done with you.

I have been a big fan of Krylon since I got into the hobby. they make a wide range of shades. Paint goes on easy and, as long as you don't get crazy with it, it does not obscure detail. I still love them as a primer but I am done with their clear coat. 

The Necron Tomb Blades fogged and I almost lost my mind. I thought I had it under control when the Battlewagon came up for priming but that fogged too. I thought that maybe it was something I was doing, so when it came time to clear coat the Flash Gits that I have been worming so hard on for such a long time, I was super-careful. I waited until the humidity was under 50%. I did a test model on a mini that I would not mind repainting and everything seemed to go well. I did a light coat on all the minis as a first pass and walked away for an hour to let it dry.

As I was spraying, I could see the clear coat fogging. I tried to fix it by putting it in front of a fan. no good. I tried giving a mini another blast of clear coat because that has worked in the past and still no joy. 

I have started repainting a few of the bits and minis, I am going to try to fix it with Testors dullcoat or another Krylon matt coat that I have used before. 

I could be something I am doing. I do have a habit to get the paint can really close to the minis when spraying, but I feel like I was doing a pretty good job this time. It could be the weather but I was sure that the conditions were prime (pun intended). If this paint is so temperamental that it can not function above 50% humidity then I can't use it. I may be the paint. It could be defective or old. Regardless, I am throwing it away. 

Sunday, August 9, 2015

Finished - Kaptain and last of the Flas Gitz

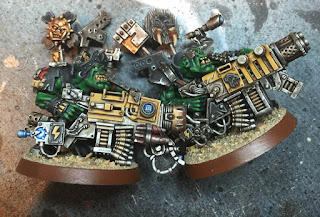
Finally, the Gits are done. This was a monster project. In the time it took me to paint a single git, I could have painted 4 Space Marines. The bodies are the size of Nobz and take the same amount of time to paint, but their guns are huge and have layers of armor over them. Once that is done, then there are the thrice-damned back banners. So much detail everywhere.

I spent a little extra time on the Kaptain as is warranted by his station. I most often see people paint the trench coat model with a black coat but I wanted something ostentatious and nothing is more stone-cold pimpin than a purple coat. I really wish the gun did not cover up the front of the chest so it was more noticeable. 

Monday, August 3, 2015

Finished - Two more Flash Gitz

Only two more and Badrukk to go before all the Gitz get done. 

I got bored (and started to run out of) the interesting back banner bits for the Flash Gitz so I had to start improvising. I used a shield from the Feral Orks and a glyph and gunshield for make shift back banners. 

Other conversions include a scope for a Gitfinda and a terminator shoulder guard. I also experimented with konverting the gunz in decidely non-Chapter Approved ways. In addition to the power plant bits, I added extra muzzle bits to the opposite side of the gun for a exhaust port of sorts. I repositioned some bits to align in odd angles so that nothing on the gun was square

On the table now - Badrukk and IPA

 I can remember a time when I would unwind with video games or movies at home. These days, all I want to do with my free time is paint. Nothing is better than throwing on a podcast or Netflix and painting for 6 hours. 

Except maybe having a beer with it. 

I used to like stouts and porters, but have been gravitating toward IPAs lately. While mighty tasty, beer (and IPAs in particular) tend to have a high ABV. That makes it difficult to enjoy more than one and still have the manual dexterity to put paint to plastic. 

BEHOLD! Introvert Session IPA from Left Hand Brewery. Session beers are typically under 5.0% ABV as opposed to the 7.5% or higher for most IPAs. Some can have less flavor to go with the lower ABV, but not this one. This gives me everything that I want from an IPA but a manageable amount of alcohol.

My current project is the King of the Gitz, Badrukk. I got a resin one when I bought the big box of him and his boys, but recently picked up a metal one for a sing on Bartertown. I like metal character over resin ones so decided to paint the metal and sell the resin. 

Tuesday, July 28, 2015

Finished - Two More Flash Gitz

I am really excited to have these two Flash Gitz finished especially the one on the right. Not only does this give me a total of 7 Gitz, but I am super-pleased with how one of them came out. 

This is a story about converting and how a single bit can get you thinking about building a whole mini around it. It all started with the cigar bit. As soon as I saw it, I knew that I had to use it. Initially, I wanted to use it for the Kaptain as he smoked and directed his Krew while a few Grots carry and fire his giant Snazz Gun. This proved far too complex to pull off so I settled with using it on a Git. 

At some point I knew that he would need an ashtray. I wanted him lazily gunning down Beakies or Umies while ashing to a hand made ashtray set on his gun. Since he was smoking with one hand, this dictated that there would need to be a handle on the gun. Also, I didn't think it would be stable enough with one hand on the gun and the shoulder strap to keep the ashtray from sliding off. Also, I wanted to have the gun resting on the ground to add the lazy factor. I had already used the "ground claw" looking gun mount so I opted for the bipod mount. 

I also wanted more of the Git's chest exposed on the mini as opposed to the other Gitz to draw the focus to his face and arm and add the laziness of the mini. This necessitated having him standing at a larger angle from his gun and not hold it so close to his chest. I had to trim part of where the arm and shoulder meet to get this angle. Easy enough and this is an old trip covered in old GW books and maybe even the 3rd Ed main book. 

Even with the 40mm base, it is crowded. The gun hangs off the edge and only one of the bipod feet was on the base. On the other model with the "ground claw" mount, I just hung it over and planned to glue to some sand to the bottom to cover it up. On the bipod, I didn't feel this was acceptable, so I broke a rule. I changed the shape and size of a base. The mini was already glued down, so I could not just mount him onto a 50mm base. What I did was cut a semi-circle into a 25mm base and glue it to the edge of the base. It is hardly perfect but it does draw attention and it is functional. 

Lastly is the ashtray. I am no expert in sculpting and anything that I do that looks good is complete luck. That is why I keep it simple. I rolled a ball of green stuff and smushed it flat. I used the end of a paintbrush to press a half sphere into the now disc. Then I cut cigar holders into the sides with the edge of a hobby knife. After letting it dry, I glued it downa nd painted it blue to contrast with the yellow gun and draw more attention.

Sunday, July 12, 2015

Finished - Mega Armored Nob

I had a metal Meganob spare and decided to bang him out as a side project in the same colors as my Geoff Flash Gitz. My idea for the Nobz and Meganobz is to have them drawn from the biggest and baddest of all the Ork Klans. To that end, their color schemes are going to be all over the place. I am going to try to paint up a Nob for each unit if appropriate or a Meganob. Unfortunately, I only had the one Meganob to experiment on. I need to trade for some on Bartertown, but few people are trafficking in them. Those that are often offer incomplete minis which is no good for me. 

The plastic box is amazing but utterly insanely priced at $63 for 3 minis. Even at the standard 20-25% off retail plus shipping, that particular box is priced outside of my reach. 

Since it is going to be a while before another Meganob is Finished, I will have to value it. To replace the mini is a challenging prospect. eBay prices run $15 to and insane $25. I think that if I was patient that I could replace them for $15 each. The paint job is simple but worth $20 for me. I had to supply an extra bit from the Nob sprue because he was missing the Iron Gob. That is worth $5 to me for a total trade/replacement value of $40 for this mini. 

Finished - 4 Gunners for Battlewagon

The Battlewagon has two places in back for gunners and I made the front two doors into gunner spots with the addition of a little plasticard. That gives me emplacements for 4 gunners and the turret. That is all the extra Rokkit/Big Shootas that the Battlewagon will allow. 

I tried to make each of minis unique. I have wanted to do a "screaming two-handed Big Shoota" mini for a while now. While building him, I realized that no one, not even an Ork, could shoot a gun like that unsupported. That is not an issue when he can brace the gun on the side of the Battlewagon's side armor. If this mini was on foot, he would look silly and unrealistic. Normally, I am a fan of "silly and unrealistic" in my Ork army but the mini's pose looked stupid and that is never good. To avoid this stupidity, I magnetized a bipod for him. 

These minis cost me maybe $15 in bits and $20 for the painting. The converting is worth maybe $5. Total trade/replacement value is $40.

Finished - First Five Flash Gitz

A full unit finished! 
I am regretting somewhat painting the guns yellow. This unit was supposed to be Goffs and colored mostly black and silver. While painting the Battlewagon, I got the wild idea to paint the weapons yellow. That might have worked if these guys's guns were not the same size of the body. The effect is that, no matter how little yellow that I use in the rest of the model, the mini comes off as looking like a yellow mini. After discovering that, I tried to keep yellow to a minimum in future minis. 

The old metal classic Flash Gitling really sands out because he is smaller and has a sane-sized gun. My head-cannon for him is that he recently joined to replace a fallen Git. The little feller has not had enough time to amass a stash and reputation enough to build a really big and insane gun. 

Even though this is a Finished post, I am going to wait to make a full post until after I have finished all of the box including Badrukk. 

Friday, July 3, 2015

On the table now - The next 3 Flash Gits

After finishing the first two test Flash Gitz, I started work on the main body of the unit. I knew that I wanted to use the cyborg arm and leg and was struck by the idea of using them on the same guy as if he at one point had a really really bad day. I also did a little head swap to give that mini a more mechanical head from the Nobs sprue. 

Sunday, June 28, 2015

Mostly Finished - Flash Gitz

Too drunk to paint, so we type.

Mostly finished these two guys. They are only missing their Boss Poles and Git Finda. I call that pretty much done. I'll post finished pictures of these minis when the squad of 11 is finished.

11 is the perfect number for a squad of Flash Gitz. Even with mounting a Killkannon, a Battlewagon can carry 12 Orks. That leaves enough room for a Big Mek for Kustom Force Field and 11 Gitz. It is also perfect because that is the number of minis that I have and I do not plan of getting more. 

I adore the way these minis turned out. I don't know that I learned anything from them though. I have incorporated a extra stage to my green skin technique of painting on some purple wash to deepen the tone of the skin to maych the overall dark tone of the minis. It works pretty darn well. 

I had hoped that using Daemonette Hide as my base for green skin and washing it green at a later step would provide an adequate depth of darkness and contrast but I have found that the purple base coat seems to be overwhelmed by the green wash. It seems that no matter how much purple that I leave showing under the green paint, it all gets turned green by the green wash. There are bigger problems in the world, I guess

I am mostly happy with how the minis turned out overall. The intention was to make them black minis with yellow weapons and highlights. I feel like whatever amount of yellow I use, it overwhelms the mini and makes it look yellow. I am regretting wanting to paint the weapons yellow at this point. 

Sunday, June 14, 2015

On the table - Flashgitz

After finishing the Battlewagon it feels empty. It needs some bodies to fill it. The dream has always been to fill it with Flash Gits and devastate everything within 24 inches of it. The Flash Gitz and Battlewagon are in ideal paring as the former can take the latter as a Dedicated Transport. 

To kick things off, I picked a metal Flash Git that predates the current plastic set and one of the minis from the Badrukk's Flash Gits box. Both acquisitions are from Bartertown. The metal guy came as part of a large Orky trade long ago and I got the Badrukk box for 50% retail including shipping from a generous soul. 

Finished - Battlewagon

This big, black, bad bastard really deserves its own epic post but I don't have that kind of time. It took over a week to finish this bad man and I could not be more proud. 

I had a similar problem when clear coating this mini that I had with the Tomb Blades in that it fogged. Humidity was less than 50% and temp was within range. My only excuse was my over-zealotry with applying it. I am going to give my standby of Krylon matte clear coat one more chance under ideal conditions before giving up but I think that they may have changed the formula or something. 

The idea was for this Battlewagon to be a ride for the Lootas or Flash Gits. As the Speed Freak Lootas already had the Wrecka as a ride, I decided to paint this in the same paint scheme as I planned to paint the Flash Gitz colors of black, red and yellow. 

This kit retails for about $90 and the paintjob is passable for me. I used a lot of drybrushing and re-washing on this mini and that feels like cheating a little bit. I would feel bad about saying that this was better than a 6/10 for me. I value the painting at about $60 given the time it took. The small conversions of the Driver and magnets is valued at about $10 for bits and time. Total replacement cost is $150. I don't know that I would trade it for less. Given the complete nature of the kit (with all accessories including Killkannon and Deffrolla (non pictured but included)) and the neutral nature of the color scheme, I feel that it would fit in with any Ork army. Given that, I feel that a fair trade value for this mini is at least $200 if not more. 

Monday, June 8, 2015

Look what just showed up

I have been wanting a Dreamforge Leviathan for a long time and now I have two. I made a mistake and ordered the larger size which is 8.5" tall. this makes it an inch or two shorter than a Warhound titan and an inch too tall for a Knight Titan. I did not know this until after they had arrived and had to place another order for the smaller size which is 1/100 scale. The smaller mini stands about an inch shorter than a Knight Titan, which is what I want to use it as a proxy for. 

Mark at DFG was a rockstar in arranging the second order. He messed up a small part of it but supplied the missing part at no cost. That was a really classy move. Dreamforge Games is one hell of an outfit and I am a fan now. 

Initially, I wanted to return the larger ones but Mark said that I would have to pay shipping and a 20% restocking fee. Doing the math, I would have rather traded the Leviathan on Bartertown at retail and save the 20%. I would be paying shipping either way and trading not only saves me 20% but, if I was very shrewd, I could trade for more than I paid for them. 

On the table now - Something Big

Taking a break from painting (and repainting) tiny minis and bought into a large mini. If you are an Ork player I am sure you can guess what it is by the grill.

Thursday, June 4, 2015

Goodbye old friend

I don't remember the year I bought my first Dremel but it was likely around 2006. I got the cheepo Dremel 7700 but I splurged on the kit with all the fancy attachments. I never used the sanding wheels, discs or really any of the other attachments. I did use the "high speed cutter" frequently. I used it to drill holes for magnets in metal minis before I learned the beauties of 1/8" pin vices. I used it to turn metal Grey Knight Terminator Storm bolter arms into bare arms for conversion into Storm Shield arms. I gracefully took off iconography of metal pauldrons. 

I loved this little thing but after almost a decade of service, I decided to retire his little tungsten-carbide self. 

Mt. TBP

I can't say precisely when this started, but I have more things to paint than time. I am fond of saying that if I quit my job and painted 10 hours a day and 5 days a week, then I would still be able to paint for 6 months and not have to buy anything new. That does not stop me from buying and trading for new things though. 

I think it all started in 2008 when I started a 40k budget. I allotted $15 a week for minis. That was enough to get a blister pack (back when they were $7-$14 instead of $35) or I could save it week to week and get a bigger box. 

There was always The War Store. It was great to get anything I wanted that was 40k at 20% off and cheep shipping. I saved up a few weeks of my weekly budget (or sometimes spent money that I might not have actually had)and put in a large order to Neil. 

At some point I discovered Bartertown and was able to get some minis pretty cheep. I was able to get the occasional mini that I wanted for less than half but they were often assembled and painted needing rehab. 

Finished (again) - Tomb Blades

It rained yesterday. Today it was sunny. It was going to rain tomorrow. I checked Google weather and slid that little bar across the next 12 hours checking the humidity. 6pm tonight was the lowest the humidity was going to be for a week. If I was going to clear coat the Tomb blades (again) it would have to be now. 

I steadied myself and took a deep breath because if I messed these minis up again, clearly the only choice would be to set them on fire. Flame cures failure... right? I kept the spray can far from the minis and did two light coats on each side. Every time I checked on them I was ready to see the foggy milk of doom settling over them. The second time I checked them, I hallucinated that this was happening but it was just the light. 

Friday, May 29, 2015

Rehab - Tomb Blades

My test mini is finished for rehabbing the Tomb Blades. The painting went pretty fast and the results are ok. There are still some weird-looking places but it looks ok. 

Now, I just have to do it 5 more times before I can put this mini nightmare behind me. 

Double Fail - Tomb Blades

The heat gun fix not only did not work great but it warped the plastic minis. I bought a fancy heat gun with digital adjustable heat and no help. I tried gently heating all surfaces and no joy. I think there is just too much variation in thickness of plastic for it to work. 

The worst part is that it bent and warped the plastic. I tried the heat gun on three minis, and all three are warped in some way. It is hard to tell from the pictures, the the one on the right is warped to the left. I doubt that anyone will be able to tell on the table top but it irks me. 

The new plan is to repaint them. The fogging ruins the mini by ruining the shading. I am going to reapply all the shading and then rehighlight the minis. This is not ideal and certainly not easy. 

Tuesday, May 26, 2015

Failure - Tomb Blades

I am so mad at myself that I could spit. I tried to clear coat the Tomb Blades and all of them fogged. It was hot and humid and I pushed my luck a little too far. Most of them are ruined. I am going to try this guys heat gun fix but I don't hold out much hope. I may try the oven or pick up a heat gun. 

Monday, May 25, 2015

Finished - 6 Tomb Blades

Finally, all 6 of them are done except for the weapons. The side mounts for the weapons are magnetized as well as the slot on the back for the support system. There is also a magnet in the base that hold it to the stand. It is just easier to mount them that way and no chance of it breaking. 

I painted them in my Rusty Necron scheme with the rust parts being brown, stipple red, stipple orange, wash Agrax Earthshade then touch up red and orange. I do the chips with Carcharodon Granite followed by Chainmail then washed Agrax. I touch up the chipped areas with Mythril Silver. the clearly inorganic components are painted Boltgun or Chainmail then washed black. I do a broken edge highlight of Mythril Silver. There are some aread that I wash blue to give contrast with the orange. 

Retail for the kit is $41 which is a little crazy considering you only get 3 minis. Paint is worth about $60 for the set of 6. Magnatizing them adds about $5 onto each model bringing their replacement value to $172.

Saturday, May 23, 2015

On the table now - Tomb Blades

I have been working real hard to get these guys done. I don't know that I ever would have bought or painted these Tomb Blades but they are required for some reason in a Decurion Detachment.

Friday, May 22, 2015

Finished - Green Cow of Nurgle

I found this little guy in my bits box and I have no idea what he is. I took a cue from the mutated hand and three circles on his weapon and guessed that he was some sort of WFB Nurgle Beastmen thing. He was already painted... poorly, so I painted over him with Bleached Bone and started the process for Nurgle's Skin. Mixed in there are metals, Simple Rust and leather. There is a little bone and wood for the stick. I really need to do a step-by-step for my common color schemes. 

I'll probably use him ad a Herald of Nurgle.

No idea what this mini is worth but I could probably replace him for $10. Paintjob is worth $20 making his replacement $30. I would trade him for $45.


1-42-17 Update: I traded this mini with these two worms for a Dark Angel Codex. 

Monday, May 18, 2015

Finished - Palanquin of Nurgel

I have wanted to build modular versions of the Daemonic Mounts for a while and the easiest to do was the Palanquin of Nurgle. Now, a Palanquin is supposed to be a covered box supported with sticks and born aloft but the backs and sweat of the unfortunate. I skipped the sticks and the box, but this is what I have. I took inspiration from Epidimius and had a surface help up by a host of Nurglings. 

I kept it simple by making a disc that was slightly bigger than a 40 mm base and made a guard for it out of plasticard. I put a stand on it to later secure to the base. I used a mix of old metal Nurglings and newer plastic ones. If I had been thinking, then I would have used 7 of them, Nurgle's favored number. 

I did incorporate the "three" symbol into the top of the palanquin, as you can see from above.

On the table now - Tomb Blades

The prototype Tomb Blade is finished and I learned some good lessons. 

1. Magnets are best applied to the weapon mounts after the weapon mounts are in their final position. 

2. Think of colors in terms of what wash you need to use. Paint everything that needs Agrax then everything that needs Nuln. 

3. Sometimes, detail is not worth it. I skilled some detail on the spine and wires and feel ok about that. 

The rest of the Tomb Blades are getting painted assembly line fashion. It is a lot of stop and start because I am waiting for washed to dry but everything is going well. During all that waiting, I banged out a Nurgle Palanquin so the time was not totally wasted. 

It is slow going but I think the final product will be worth it. I am looking forward to fielding a Decurion Detachment until it become no fun. 

Sunday, May 17, 2015

On the table - Six Tomb Blades

I am starting the Obligatory Tomb Blades choice so I can be like the cool kids and field a Decurion Detachment. I didn't even notice it in the Codex until Charles pointed it out to me. Then I saw all the drama on the internet. I am not going to link to it because it is everywhere. I don't know why people are so upset about a 4+ Reanimation Protocol roll when they had that in the 3rd Edition Codex and many of them had better armor too. There are plenty of synergistic wargear and choices that make it a little abusive. If I was designing the Necron codex, I would make the Decurion Detachment able to re-roll WBB rolls and leave the things that give a bonus to very few available options. 

Back to Tomb Blades, you have to take at least 1 unit of them to get the benefits of the detachment. This seems more like GW trying to sell more of a crummy kit as it does not make any sense. Many of the new formations do not make much sense. They just seem random and the Codex provides no explanation or fluff for any of it. 

I started with one Tomb Blade as a test mini and that is going pretty well. I decided to magnetize the weapons on the back mounts and just shoehorn the Particle weapon into place. I also am going to magnetize the optional support system. I am not going to magnetize the Shield Vanes that give the better Armor Save as there is no good way to do that. I am going to douche out and glue them in place but just have to note when they are actually taken as wargear.

I broke them down to three main sub-assemblies and some accessories. There is the hull, the shield and the driver. Once those are done, most of the mini is finished. 

Thursday, May 14, 2015

Finished - Iron Warrior Havocs

I got these old old metal Chaos space Marine minis in some trade or another and they sat in my bits box for ages. Perhaps years. I have another of these types of Las Cannon Marines and was not really a fan of it. The Auto Cannon is a straight up ugly mini. If it were not so hard to convert them up, I would trade it. I really love the Heavy Bolter Marine. It looks totally Grimdarkand 40k. There are hooks and chains and a BFG that looks like it was carved out of single giant block of steel. 

Wednesday, May 13, 2015

Finished - Gun Servators

My Inquisitoral Warband grows! I have one Inquisitor finished and 2 more Inquisitors that I never posted about to cover my HQ. I have been slowly building the group of mercenaries, misfits and masterminds that shall accompany them into battle. Already finished for the Warband are Three Psykers and two Jokero that I have not posted about. That, combined these three finished Servitors, makes up the majority of the shooting portion of the Warband. 

The dream is an Inquisitor and 11 of his buddies riding around in a Chimera or Valkyrie (if I am feeling squirrely). How those 11 dummies break down may change but for now I am planning it around the 6 people that can shoot out of the top of the Chimera. I like the Psykers that can lay down a S7 AP2 large blast as long as there are 5 of them but only counts as one guy shooting. The Jokero can shoot Las Cannons from their eyes apparently and these three lobotomized dummies with guns for arms round out the shooting. There is one slot left for people to shoot out of the top hatch and I'll save that for a wildcard. 

Sunday, May 10, 2015

Finished - Genestealer Cult

Greg from Cranky Old Gamer now has a finished Genestealer Cult. The step-by-step here worked out well and I adapted the color scheme to the robes of the Hybrids and the armor of the Cultists. Greg had requested a blue skin tone for the human Cultists but I could not make it look good. My back up plan was to add some purple wash into the shading on the skin. I had been doing this on my eyes for a while now but I took it to a new level. 

The base colors go on well but there is a fair amount of fine detail work that slows down the process. I have had these minis for almost three weeks and the painting took about 35-40 hours because of that detail. 


Finished - Deathleaper Lictor

Long ago, I had a dream about starting a Tyranid army. It was going to be a first wave of a bug invasion. A Deathleaper as an HQ, Genestealers as Troops and Lictors as Elites. None of the Tyranid creatures that are normally associated with a later invasion. 

I scrapped that dream in early 2014 when I traded all my Tyranids on Bartertown for some Forge World Terminators and a busted Baneblade. 

I resurrected it when I started Greg's Genestealer Cult minis. I used my Space Hulk Genestealers as test minis for that project and just kind of kept going. The minis were turning out so well that I dug out some Lictors that I had not been able to trade for a good deal and painted them up too. The plan is to use the Lictors with some special rules in Space Hulk or in Deathwatch RPG but before I knew it, I had an almost 300 point Tyranid army painted. Now, I am starting to think that I could make this happen after all.