 Formatting has plagued all of my Step by Step articles. I feel that it stems from them needing to be picture-heavy and coordinating those pictures with text. Either there is no skillful way to do this or I am not skillful enough to get it done. Regardless, all the information will be included in this post however ugly it may look.
What you will need:
Flat GW bases
A rough file
Gorilla Glue
Cotton-tipped applicators
Wood, PVA or Elmer's glue
Water
A small bottle
Basing sand
Spray paint (here Krylon flat black)
A drybrush
Paint for painting the sand (here 1:1 Abbadon Black and Dawnstone, Dawnstone, Nuln Oil)
Paint for painting the toxic sludge (here Celestra Grey, Temple Guard Blue, Gulliman Blue)
 1. Even though GW bases come textured, I still like to roughen them up with a file to be sure that the sand sticks to the base well. If you don't do this then sometimes the sand can peel up off of the base. While it is easy to glue it down, it never looks the same.
2. All I do is roughen the base with the edge file and try to be as irregular as possible. I move the file in a few different directions and make deep gouges.
3. To start making the outlines for the toxic sludge, grab your Gorilla Glue and CTA.
 4. Put a small dot of Gorilla Glue on each base. Less is more here. Gorilla Glue expands 2-4x in size. If you put too much it can overflow and ruin your bases not to mention whatever is near or under them.
5. Take your CTA and spread the Gorilla Glue in interesting and irregular patterns. Keep in mind where the feet of the model will go. If you don't want their feet in the muck, then make sure you leave enough room.
6. Let the Gorilla Glue sit until it cures. You can mess with it while it is drying if you want to create irregular surfaces but be careful. You may just want to let the glue dry overnight at this point.
 7. Once the Gorilla glue is dry, it is time to add the basing material to the rest of the base. I use a mixture of playgound sand, GW sand and GF9 rocks of various sizes. I put the based on a movable surface and paint on the the glue.
8. I then sprinkle the sand on the bases. Be sure to get a good mix of sizes of particles. Sometimes I have to jam on a couple of big pieces to get a good mix. You can paint on some more glue and let the sand soak it up. This can help the sand stick to the base better.
9. After a short wait, dump the sand off and let the bases dry overnight. It is essential that all the glue be dry before going on.
 10. Now that all the glue is dry, the bases need to be primed so that paint will stick to them. I use flat black spray paint rather than other primers.
11. The bases do not need to be completely covered as this can eat up detail. Just a quick blast of paint is enough.
12. I went for black sand bases for these minis as they are very dark and I needed something darker than them to make them stand out. For my black, I start with a 1:1 mix of Abbadon Black and Dawnstone.
 13. The bases then get a drybrush of Dawnstone. It is hard to over do it at this point but gooping on the drybrushing can cause some of it flake off. This will expose the darker paint and ruin the effect.
14. After the drybrush comes a wash of Nuln Oil. Again it is hard to overdo it at this point but if you let the wash pool it in the crevices in the sand and make the next step hard. Follow the wash with another drybrush of Dawnstone and the black is done.
Short note here, I took these pictures pretty drunk and messed up the order. I had to copy and paste the bases at the proper stages next to the correct paint colors. I also missed taking a picture of just the bases with just the finished black sand. Please do not drink and blog.
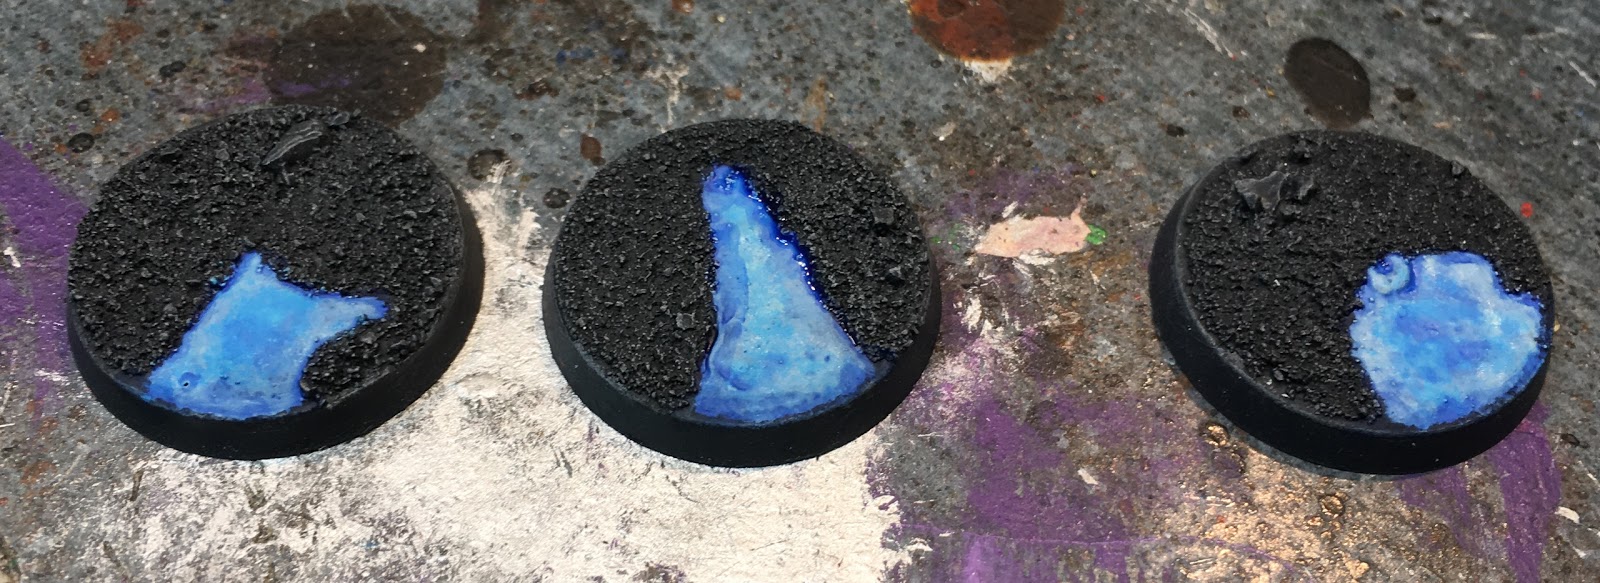
 15. Moving onto the crux of the matter and that is the blue toxic bases. Start by painting the areas with Celestra Grey.
16. Stipple on Temple Guard Blue to make an irregular appearance.
17. Paint on Gulliman Blue. I paid special attention to the border to make a dark line. Be careful at this step as adding too much can make the base overly-blue.
And that is it. I find that less is more with this style of base. Messing with the recipe too much or trying to add too much detail can ruin the effect and draw attention away from the mini.
You can also try doing this to the base with the mini already glued on. This makes it look like the mini is sunk down into the base and adds a little realism but then you have to be careful painting as to not ruin the base or mini while painting the other.
No comments:
Post a Comment