
1. Black base
2. Iron Hands Steel
3. Runefang Steel
4. Tyran Blue
5. Drybrush of Runefang Steel
6. You could also so some small hard edge highlighting on the very edges with a white or light blue.
1. Black base
2. Iron Hands Steel
3. Runefang Steel
4. Tyran Blue
5. Drybrush of Runefang Steel
6. You could also so some small hard edge highlighting on the very edges with a white or light blue.
I don't think I mentioned it here, but I got into resin printing a while back and love it. It is so long between updates here that I'm on my second resin printer. I started with a used Photon S and moved on to a new Mars 3 pro. I love it. The Mars is 8x faster than the Photon. I am not sure my eyes are good enough to notice a change in quality to a mono screen though.
Resin printed increased my need for file storage by 10 fold. GW takes down files in waves. There was already a great Thingiverse purge and now 40k files are very hard to find there. They seem to be picking at Cults now with obvious IP infringements being taken down. I've moved on from scraping Cults to telegram channels. There is so much free stuff there and it is blowing up my hard drives. I went from a 1 Tb hard drive to a 2 and now I have every flash drive I can find loaded up.
I lost my files a while back. I had a flash drive in a USB hub and was backing it up. The backup shorted out and then the main one did too. In a second I lost months of downloading and organizing. I paid a company to restore it and it was like $1000. They did not even recover all the files. It was not worth it in the end but it taught me a lesson about backing stuff up. I spent a few days learning 7zip and burning all my 40k and fantasy stuff onto CDs.
I've bought a few files here and there but most of them are free. Thing is it takes so much time to sort them. Yes I could download on demand what I wanted but with files getting taken down, I save anything that I ever might want to print. Which is a lot.

That's pretty damning so I added three copies of the same model to the slicer. One was pre supported, one I just hit auto supports and the other I supported by hand. In every case, the pre-supported model failed. The auto-support model failed half the time and my supports worked all the time.
Pre-supported models are nice and they save time, but if it is worse than auto-supports then it ends up costing more time. This is why I typically like to do my own supports. I know my printer, my resin, my setting, my temp. I know what works and what does not. I see failures on tiny things and iterate until I can get the smallest details to print and the supports not to leave damage.


Started brewing and distilling so maybe I'll write about that here too.
I've also gotten back into making props. Working on my finishing techniques and am getting pretty good.
I finished this dragon priest mask from Skyrim. It printed in 4 parts and glued up pretty well. After lots of sanding and dremeling, I got rid of most of the layer lines. Learned some cool things too. Noteable is that dremels are speed tools not torque tools. Was running it low and slow but that causes chipping and jumping. Once I turned the speed up, things got smoother.


I accepted that this was going to be a "good enough" situation because I was not going to blind painting the detail.
The blue was a solid base of Altdorf Guard Blue (or Ultramarine Blue as it is named in my heart), then washed it with Guilliman Blue. I brought it back up wiht another drubrush of Altdorf then a light dry brush of Calgar Blue. I was not going to highlight each armor panel so this was going to have to work. Blue done.
Thank the Emperor for Retributor Gold. I would have killed for a base/foundation gold paint back in the day when a decent gold took 5 layers. This gold had to cover the blue in one go because I was not going to paint all that filigree twice. There was no wash on it, just a little Runefang Steel highlight.
Sword was white, yellow, two oranges, red, brown and black in overlapping layers. Not thrilled with how it came out but it looks good from arms length. Fire is just flipping hard. I saw a thing on painting flames with contrast paints. I bought the paints then chickened out at the last second and did it the old way. Maybe later.
The mini cost me $60 and the paint is worth maybe $50 for a replacement value of $90.

Had fun with this even though it will never see play on a table but that goes for most of my armies too.
Tried to learn some new things from this but I did pretty much standard for my colors.
I will say that at larger scales, it makes you think more about light and shade but also gives a wider margin for errors.
People really seemed to like it. Maybe I'll do more busts in the future if I can find good ones.


I am about 40 hours or so into Cyberpunk 2077 and have completed maybe 10% of the game. I feel like I am just scratching the surface but have seen enough to know what I like and don’t like. There are going to be some spoilers in her, so beware.
Let’s start with the pros before I get into the complaining. This is a beautiful world. The textures and architecture are stunning. There are little nooks of detail everywhere and you can always look closer. Hardly any space is blank or feels unused. Even areas where little action takes place have lots of details like hobo hovels and feel lived in.
There is lots of variety in the game. There is an endless variety of people and even so I feel like I see familiar faces sometimes. I pass cliques of sex workers hanging out near their favorite streetfood vendor when I am going to and from my fixer. There is a small-time gangster slapping and stomping someone that wronged him in an alley (I stole his car when he was busy). I see gangs that are hanging out and committing crimes with their shiny rides parked in a believable tableau. When I go to the nicer parts of town, it is a lot of corpos walking around and looking at their devices. The world feels random and yet also hand crafted. I can admire how hard that was to do.
 Since very much awesomely fixing the hatchet handle I actually HAVE done some painting. I finished a couple of Black Plague heroes, about half of the Black Ops heroes and an experimental mini that has been sitting half-finished for ages.
 This is an ancient craft of joining wood to metal and it is an honor to learn it. I really hope that I don't mess it up.
  These finely detailed miniatures combined with the last post means I have the whole core box done. I learned a lot and now have a killer recipe for bone white armor.
 I did something for the first time in my almost two decades of painting and playing 40k. I sold a whole army. Tau were my first in 2004. The guy I played with most played Blood Angels and wanted to get out. So I bought his army and started BA in 2005. Somewhere around 2007 I started Grey Knights as a small auxiliary force that grew into an army. After that I started Chaos, Necrons, Space Wolves, Orks, Genestealers, and Knights. Never sold an army.
 Been painting quite a bit of Zombicide stuff all over the place. Black Plague, Green Horde, Invader. I even outsourced painting of some of the Black Plague zombies to a commissioned painter for money and some printing. I used clay, rollers glue and a lot of time to make textured based for all the flipping zombies. Learning my lesson from that, I just wanted some simple Martian soil for the aliens and save the complex stuff for the survivors.
 Part of raising the new baby that is a 3d printer is building it a crib. This will reduce cold drafts, give more consistent temperatures, improve buildplate adhesion by reducing curl, massively reduce dust build up, reduce noise. Lots of advantages but the main two are improved printing in ABS and being able to move the electronics outside the enclosure.
 The COVID-19 pandemic has us all stuck inside. Some people have said this would be a good time to pick up some new skills (even if they did it in an unpleasant manner). To that end, I though I would learn how to make wine in my Instant Pot. I used this recipe to get me started.
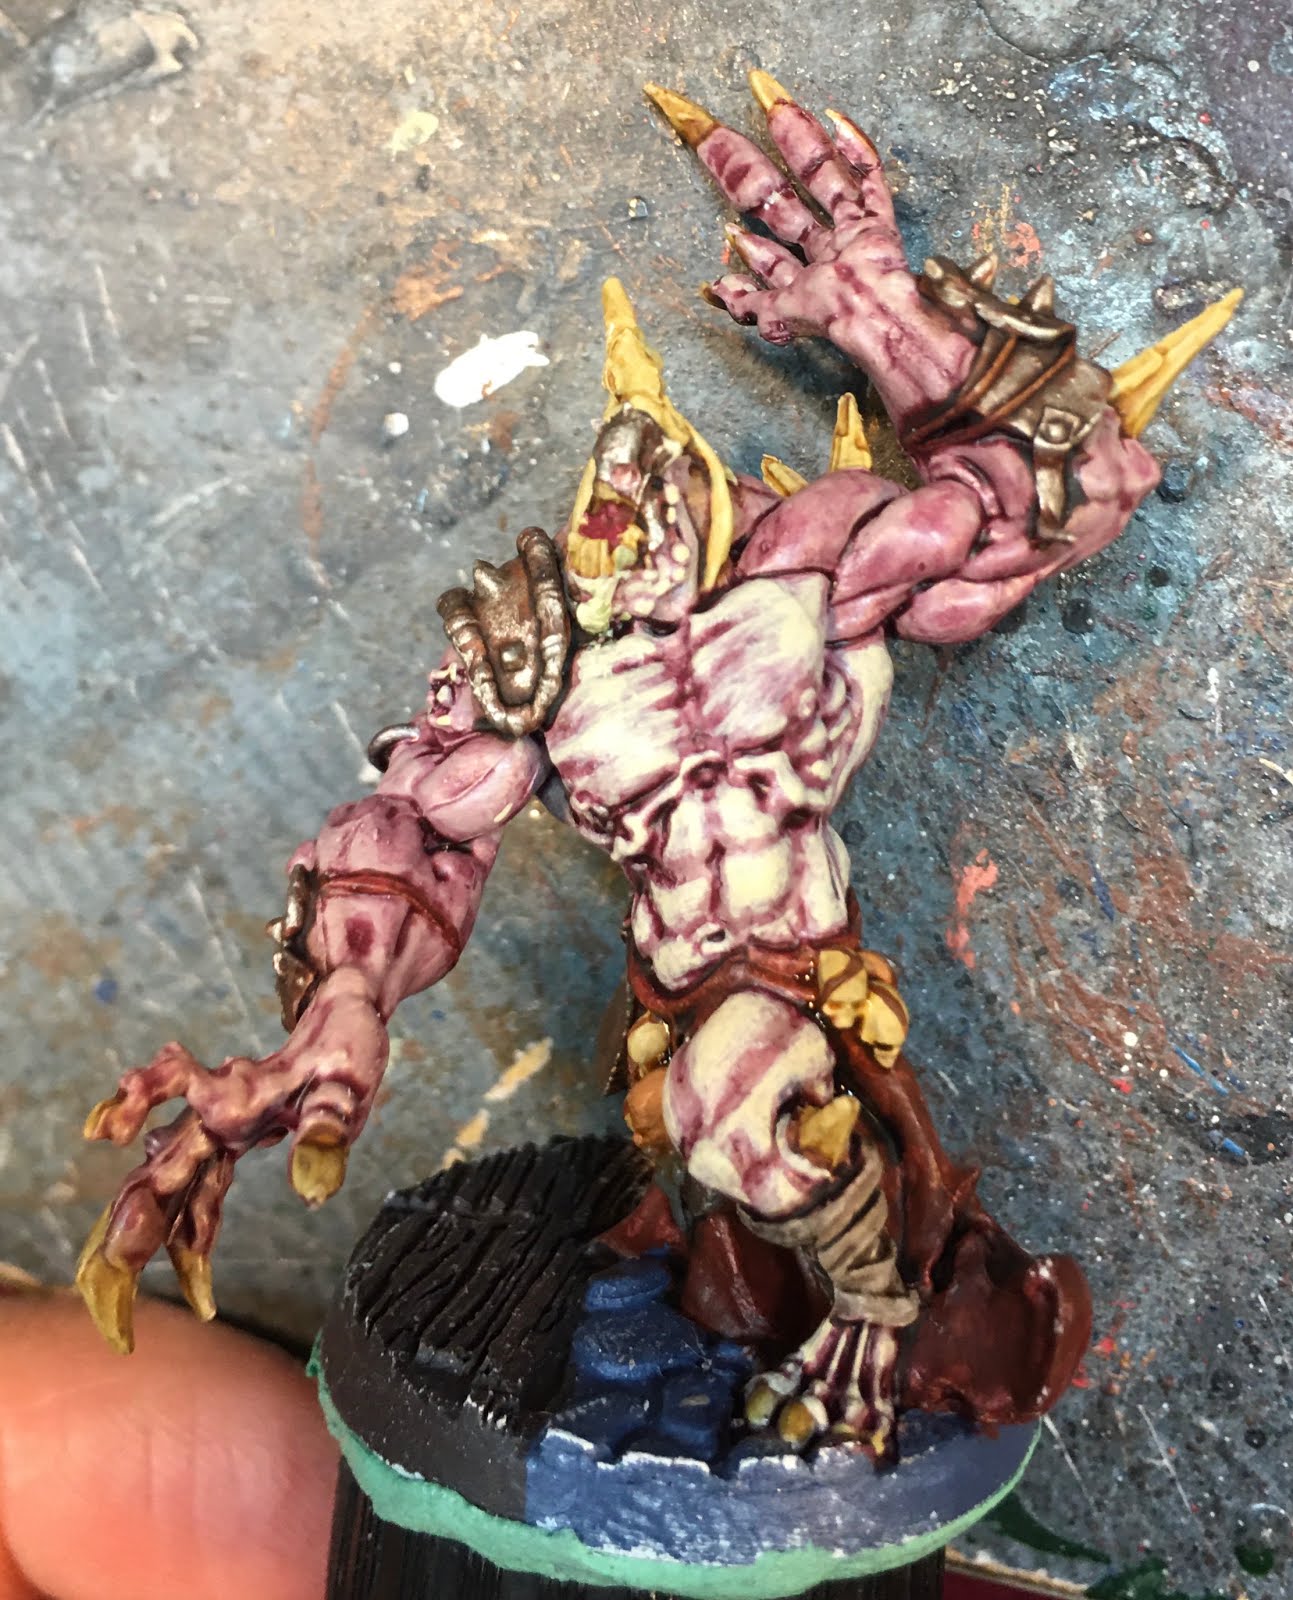 I have wanted to paint an albino big monster for probably 2 years now but have not seen a technique that I liked or believed. GW has a recipe in their painting app for Pale Flesh (that looks more like parchment than skin) and Varicose Flesh (that looked a little too pink for me. Initially I wanted to try the Pale Flesh variant as I was trying to paint pale... flesh but it called for being shaded with Reikland Fleshshade. At the last moment I decided that is going to look too natural and I wanted something more pink. Varicose Flesh starts with Rakarth Flesh and to be washed with Carroburg Crimson. I was still skeptical but through I could always strip it if it looked stupid.
 The recipe then called for Flayed One Flesh followed by Pallid Wytch Flesh. I did a test patch and didn't hate it so pressed on.
 Further Update:
 My regular D&D group of years is on hiatus due to the COVID-19 pandemic but I finished the mini for it. Blogging should be up but it is not. It is hard to stay motivated on lockdown. Despite that, lots has been finished since the last entry. Just have to write about it.
 Well the dark grey is sanded with 400 grit and triple coated. There are still little drip marks and imperfections but I think only I would notice them. I masked off the areas that are to painted blue in the picture. The babushka is to cut down on tape.
 The next step is visor installation. I am working off this guide on the MMCC boards but was not able get precisely the things they listed. I am glad I went to my local hardware store and got help because the things I was going to order would not have worked.