 This is a step-by-step tutorial on how to turn a Storm Bolter to a combi-plasma weapon. I am going to focus on the side-by-side combi-plasma that comes with the Terminator Librarian rather than the over-under that comes with the new Tactical Squad box or Sternguard box.
Bits you will need:
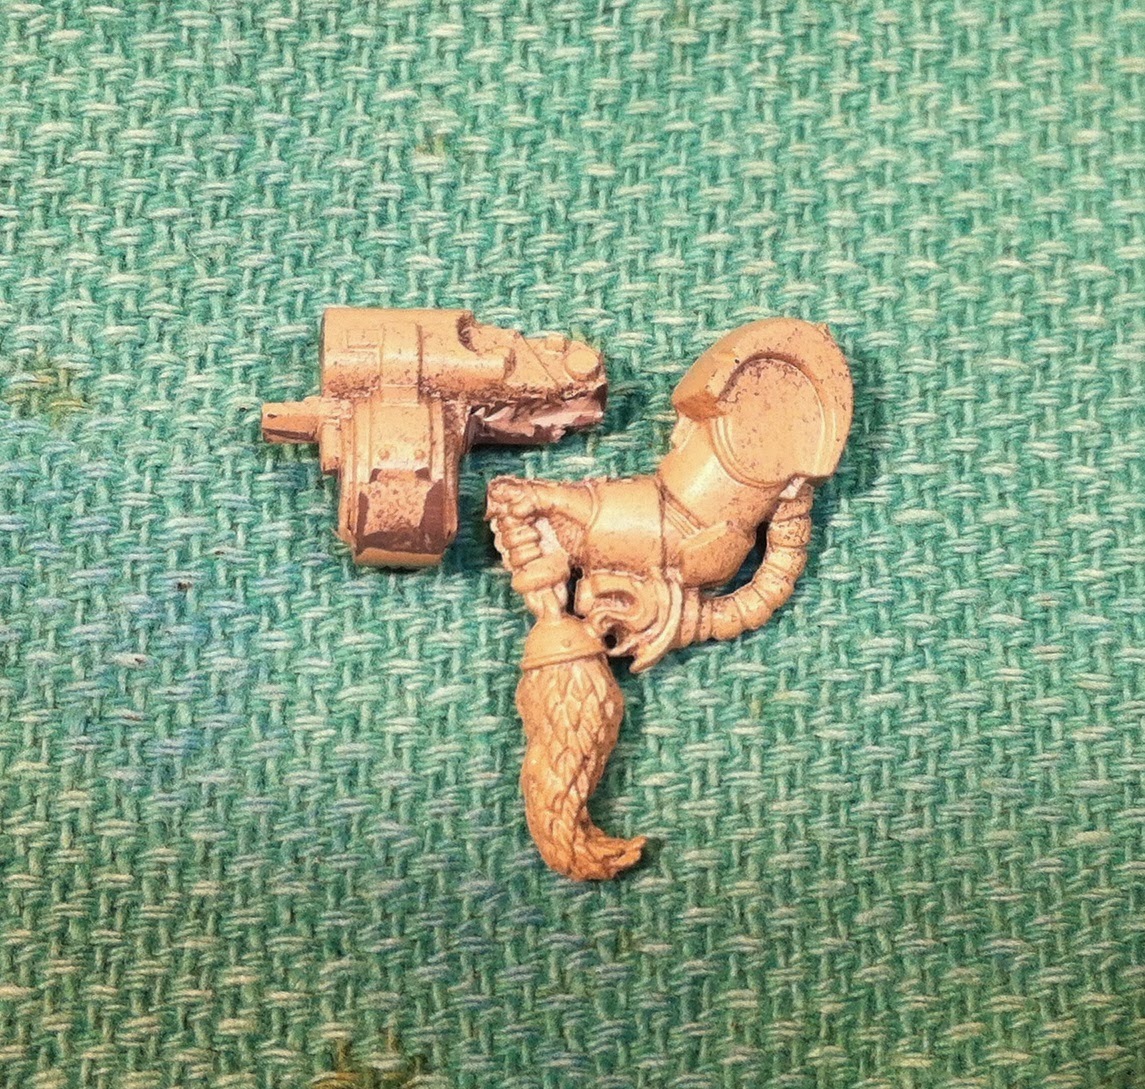
1. Terminator Storm Bolter
2. Plasma Pistol
3. Bolter
 |
| Remove barrel. |
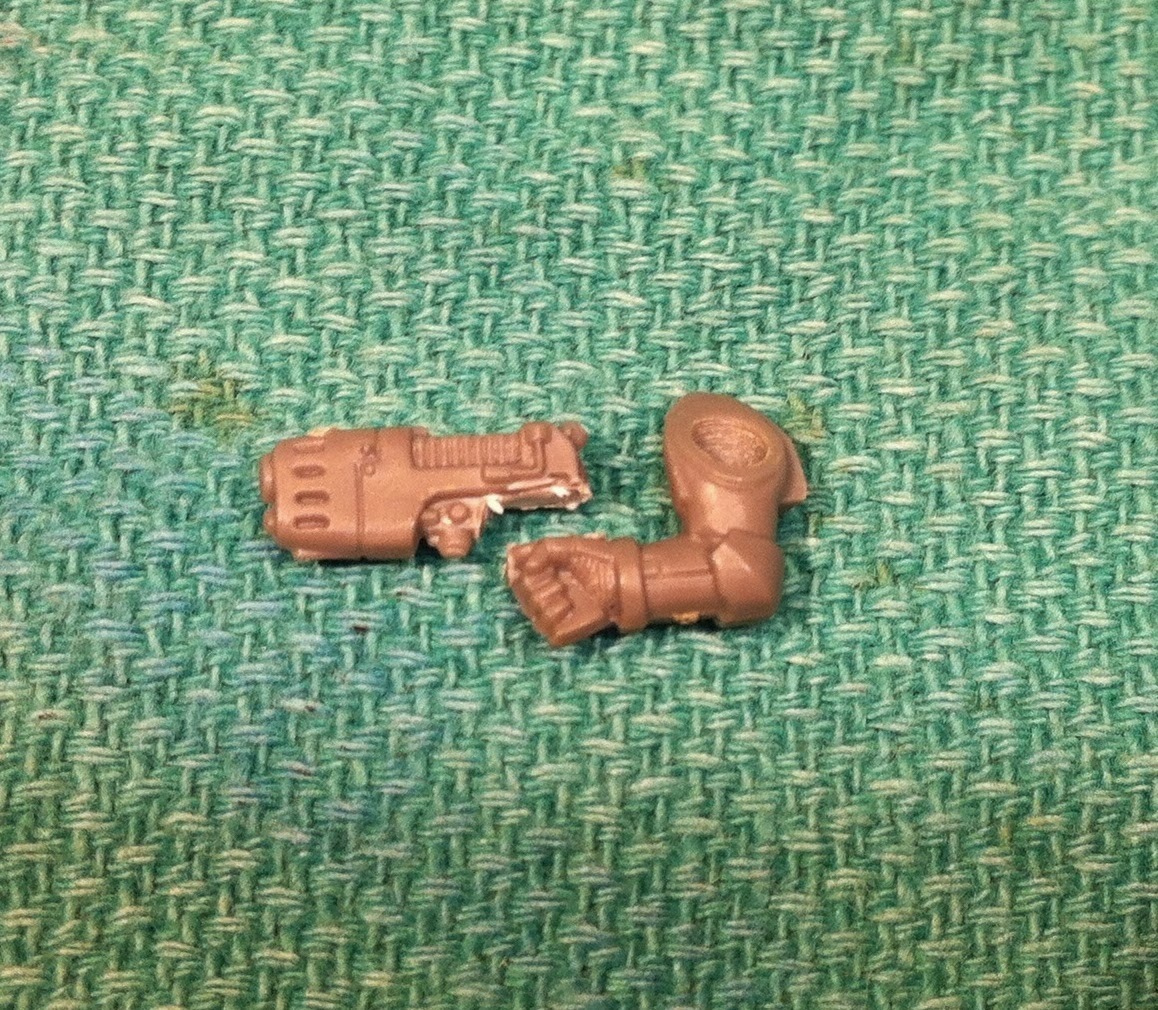 |
| Separate weapon and hand. |
3. After you have cleaned up the edges on the Plasma Pistol, you now need to make a space on the Storm bolter for it to sit. You will have to do this in two planes. The easiest way is to cut ventraly along what in this image is described as the "blast compensator" and "backup kick-sight."On the lateral aspect, you'll have to cut an L-shaped hole until it intersects the ventral cut. This part is hard to describe, but you can eyeball it and see what you need to remove to make a "plasma Pistol-shaped hole" in the Storm Bolter. You can do this with a hobby knife, but if you are careful, the work goes a lot faster and you end up with a better result if you use a Dremel with a high speed cutting bit. I prefer this one.
 |
| Cut along these lines. |

4. At this point you need a barrel for the bolter part of the Combi-weapon. You can most easily get this from a regular Bolter. Cut the front of the Bolter off and include a little of the front as well to hold the bits together. You are after not only the barrel, but also the longer bit above and shorter round bit below.
Alternately, you could cut the Storm Bolter barrel in half, but I like the extra bits above and below the Bolter for detail. In addition you would need to round the edged of the Storm Bolter barrel and that is a lot of modeling for no reason.
 5. Now it is time to glue the Plasma Pistol in place. Check before doing so that it is level and is in the place you want it. It is OK if the Plasma Pistol sticks up a little over the Storm bolter cowling as this will make the coils easier to paint later. Also, glue the Bolter barrel onto the opposite side of the weapons. Don't worry if there is a little of flashing from the front of the Bolter showing. It does not affect the final product in my opinion.
6. Lastly, drill out the barrels of both of the weapons and you are finished. Below, you can see it attached to the arm that I intended to use. I highly recommend pinning the weapon to the arm you intend as this is a major point of failure.

There are some other Combi-weapon tutorials out there including a similar one for Combi-plasma, an very simple Combi-melta, a great one about using all the bits out of the new Tactical Marine box, another great one turning Plasma Pistols into Combi-weapons for Power Armored Marines. You could also make a Combi-melta using these same steps if you had an Inferno Pistol.
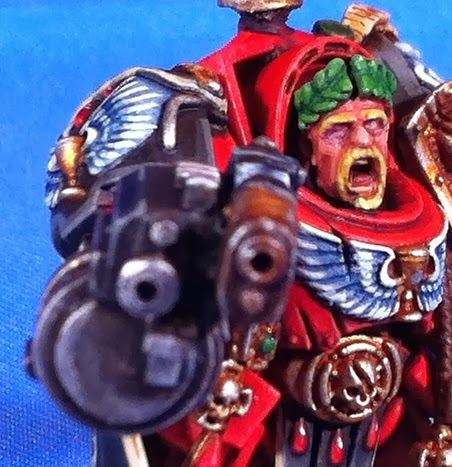
Blood Angel Terminator Captain Gaius Avidius Cassius with Combi-plasma and Power Sword:

Here is the Blood angel Terminator Captain with his Combi-Plasma in finished form. I am fairly pleased with the result. The Plasma Pistol is not quite straight but it is good enough. I especially like how conspicuous the weapon is. When a model has a Combi-weapon, I want to know it and be able to pick it out from arms-length on the table top. That gets hard if the conversion is a lottle too good.
I've posted this mini on Cool Mini or Not. There are no snarky comments or ratings just yet so it is hard to see the reception of this mini. There is a lot of conversion work that I put into it. I was really inspired by this mini to go all out on the conversion work. The sword swap was particularly hard as it involved both carefully removing his cheesy sword and preserving the hand and removing the hand from the sword bit. Normally, I would swap the bits at the wrist but the hand holding the sword was right and this guy has his sword in his left. I briefly contemplated putting the sword in his other hand, but it made the posture awkward.
The head swap was also very challenging because I knew that if I messed up, the bits were irreplaceable. I ended up removing the top part of the bit from the collar up and replacing it with a cowl from another Terminator. This also allowed me to angle the cowl a little which helped with the out of scale head.
I am really happy with how the photos came out. They are mostly clear and in focus with good crisp detail. The only thing that did not come out well is the red. None of the highlighting showed up well. I highlight my red with orange and for some reason, the camera does not pick up on it at all. I'll have to figure this out.
Evaluating this mini is hard. Replacing the mini would run between $20 and $25 judging on eBay prices. The additional bits would be at most $10. The painting and converting were fairly extensive. In the end, I would value this mini at about $55. I have a post up on Bartertown asking what this mini is worth.
No comments:
Post a Comment