 Formatting has plagued all of my Step by Step articles. I feel that it stems from them needing to be picture-heavy and coordinating those pictures with text. Either there is no skillful way to do this or I am not skillful enough to get it done. Regardless, all the information will be included in this post however ugly it may look.
What you will need:
Flat GW bases
A rough file
Gorilla Glue
Cotton-tipped applicators
Wood, PVA or Elmer's glue
Water
A small bottle
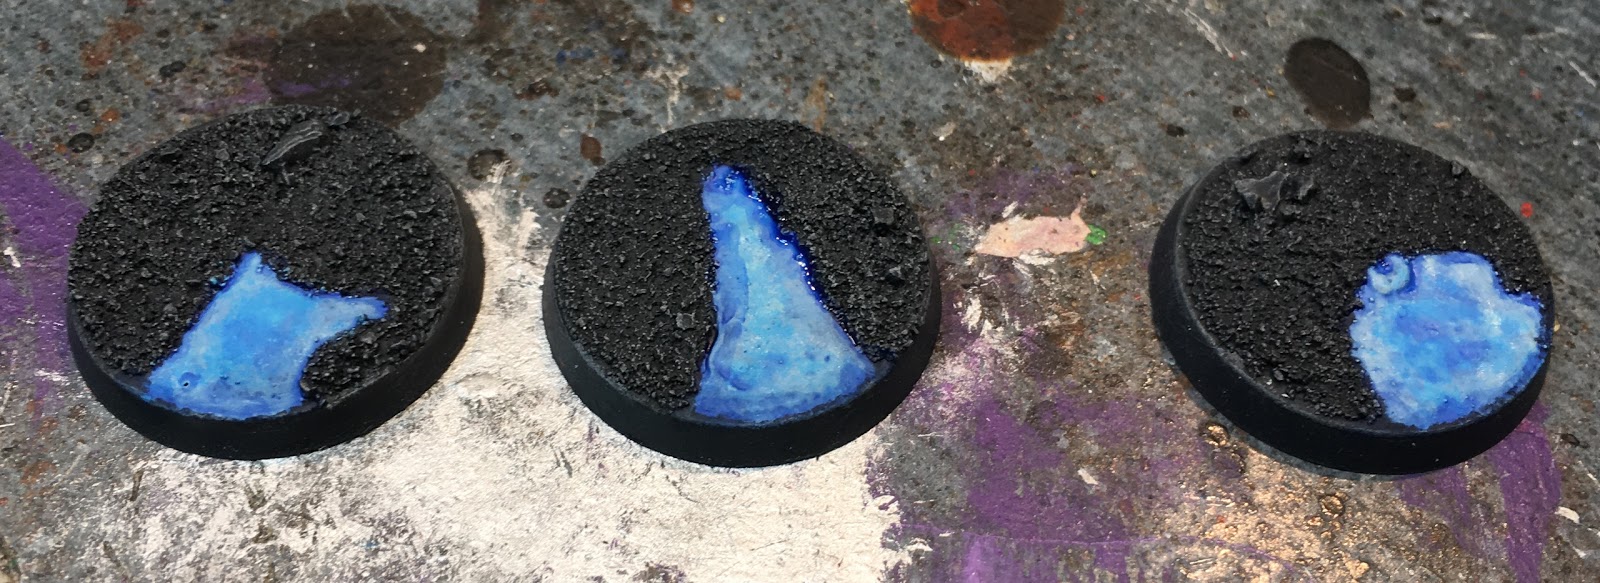
Basing sand
Spray paint (here Krylon flat black)
A drybrush
Paint for painting the sand (here 1:1 Abbadon Black and Dawnstone, Dawnstone, Nuln Oil)
Paint for painting the toxic sludge (here Celestra Grey, Temple Guard Blue, Gulliman Blue)


