Monday, July 27, 2020

Finished - Zombicide: Invader Swarm


So I am an elitist snob when it comes to painting. I know this. I think that people that use airbrushes as a final step are cheating themselves. Army Painter is for people that seem intent on ruining models.  Agrax Earthshade is a tool in your toolbox and not a Swiss Army knife. And Contrast paints are for people that don’t want to learn how to paint properly and are ok with meeting the basics of table top painting.

Then I had 100 aliens to paint and I didn’t want to repeat the mistakes of the last two Zombicide games and have to conscript out the bulk of the painting. I ran across so one that was painting the Workers with Contrast paints and got good and fast results. I picked up some contrast paints and was done with my first 5 before I knew it. A few weeks later they were all done. I haven’t completed a base set of Zombicide yet and this one was done in a blink. 

Here are the lessons I learned at my old age for batch painting:

1. No fancy basing. Be basic. Even the 5 step process for the Mars bases is better than the 3 colors with 3 stages each on top of the clay bits for wood and stone. 
2. Three colors is too many. Think big swaths of color. Don’t paint more than 2 materials different colors. Who cares if he is wearing a brown suit and hat. 
3. Learn to love dry brushing. If I ever start edge highlighting a horde again, shoot me.
4. Use washes to make different tones of color. A corollary to point 2 above, I used washes to make shading and add more color to these models rather than painting a different color.


Monday, July 13, 2020

Goodbye Space Cowboy

I did something for the first time in my almost two decades of painting and playing 40k. I sold a whole army. Tau were my first in 2004. The guy I played with most played Blood Angels and wanted to get out. So I bought his army and started BA in 2005. Somewhere around 2007 I started Grey Knights as a small auxiliary force that grew into an army. After that I started Chaos, Necrons, Space Wolves, Orks, Genestealers, and Knights. Never sold an army.

Until now.

Tuesday, June 23, 2020

Finished - Zcide Invader Workers

Been painting quite a bit of Zombicide stuff all over the place. Black Plague, Green Horde, Invader. I even outsourced painting of some of the Black Plague zombies to a commissioned painter for money and some printing. I used clay, rollers glue and a lot of time to make textured based for all the flipping zombies. Learning my lesson from that, I just wanted some simple Martian soil for the aliens and save the complex stuff for the survivors.

I found a pretty good tutorial for using the red crackle paint and painting red ground and it worked pretty well. I was skeptical about needing to base things brown, but the crackle pulls up the layer of paint below it and lots of the white primer shows through.

Aside from the bases, I decided to dip into contrast paints in the interest of getting all the Invader enemies painted unlike all the other Zombicides that sit waiting. I based the Workers Grey Seer though I would have liked to use something with a little more color. After that, the whole model gets a wash of Apothecary White. When that dries, the head and hands get a splooshing of Voluptuous Pink. I do a halfhearted blending of the areas by wiping my brush off and stippling around the edge while it is still wet. It is an amature technique with limited results but it is better than hard drying lines. With the base colors done, the bottom nails get painted with the Voluptuous Pink and no fading. The whole model gets a dry brush of Grey Seer to make it pop.

It is not my best work, but I have finished 5 of them in half the time it took me to paint any other mini. Sometimes I have to put quality on the back burner in the interest of getting stuff done.

Saturday, May 16, 2020

On The Table - Ender 3 Enclosure

 Part of raising the new baby that is a 3d printer is building it a crib. This will reduce cold drafts, give more consistent temperatures, improve buildplate adhesion by reducing curl, massively reduce dust build up, reduce noise. Lots of advantages but the main two are improved printing in ABS and being able to move the electronics outside the enclosure.

I'll get to some of the details in a bit but if I had to do things over again I would have gotten this or ideally this enclosure and not build my own. Then, if I had to build my own, I would have not tried to cut corners and just done the Ikea Lack enclosure that everyone else does. In the end, I am still satisfied with how it came out because, despite the setbacks, I could build it precisely how I wanted to (with a few compromises).

The damage for the materials alone was over $100 which is more than enough to get a premade enclosure or a couple of Lacks.

1x1 for frame $11
Acrylic plastic for windows $56
1/4" plywood for lid, floor and back $20
Adhesive vinyl tile for lid and floor $11
Screws, bits and bobs $15

Tuesday, May 5, 2020

Home-made Wine: Hobby Fuel

The COVID-19 pandemic has us all stuck inside. Some people have said this would be a good time to pick up some new skills (even if they did it in an unpleasant manner). To that end, I though I would learn how to make wine in my Instant Pot. I used this recipe to get me started.

First thing you need is yeast. I knew bread yeast was not going to cut it so I got this Red Star wine yeast. I did not realize that all wine yeast is not created equal and this appears to be white wine yeast. That would explain the sour and tart flavors I got at the end. In retrospect, a variety pack like this would have been a smarter purchace.

Before I get too ahead of myself like annoying food blogs do, here is the recipe as I did it with notes on how I would do it differently in the future:

Friday, May 1, 2020

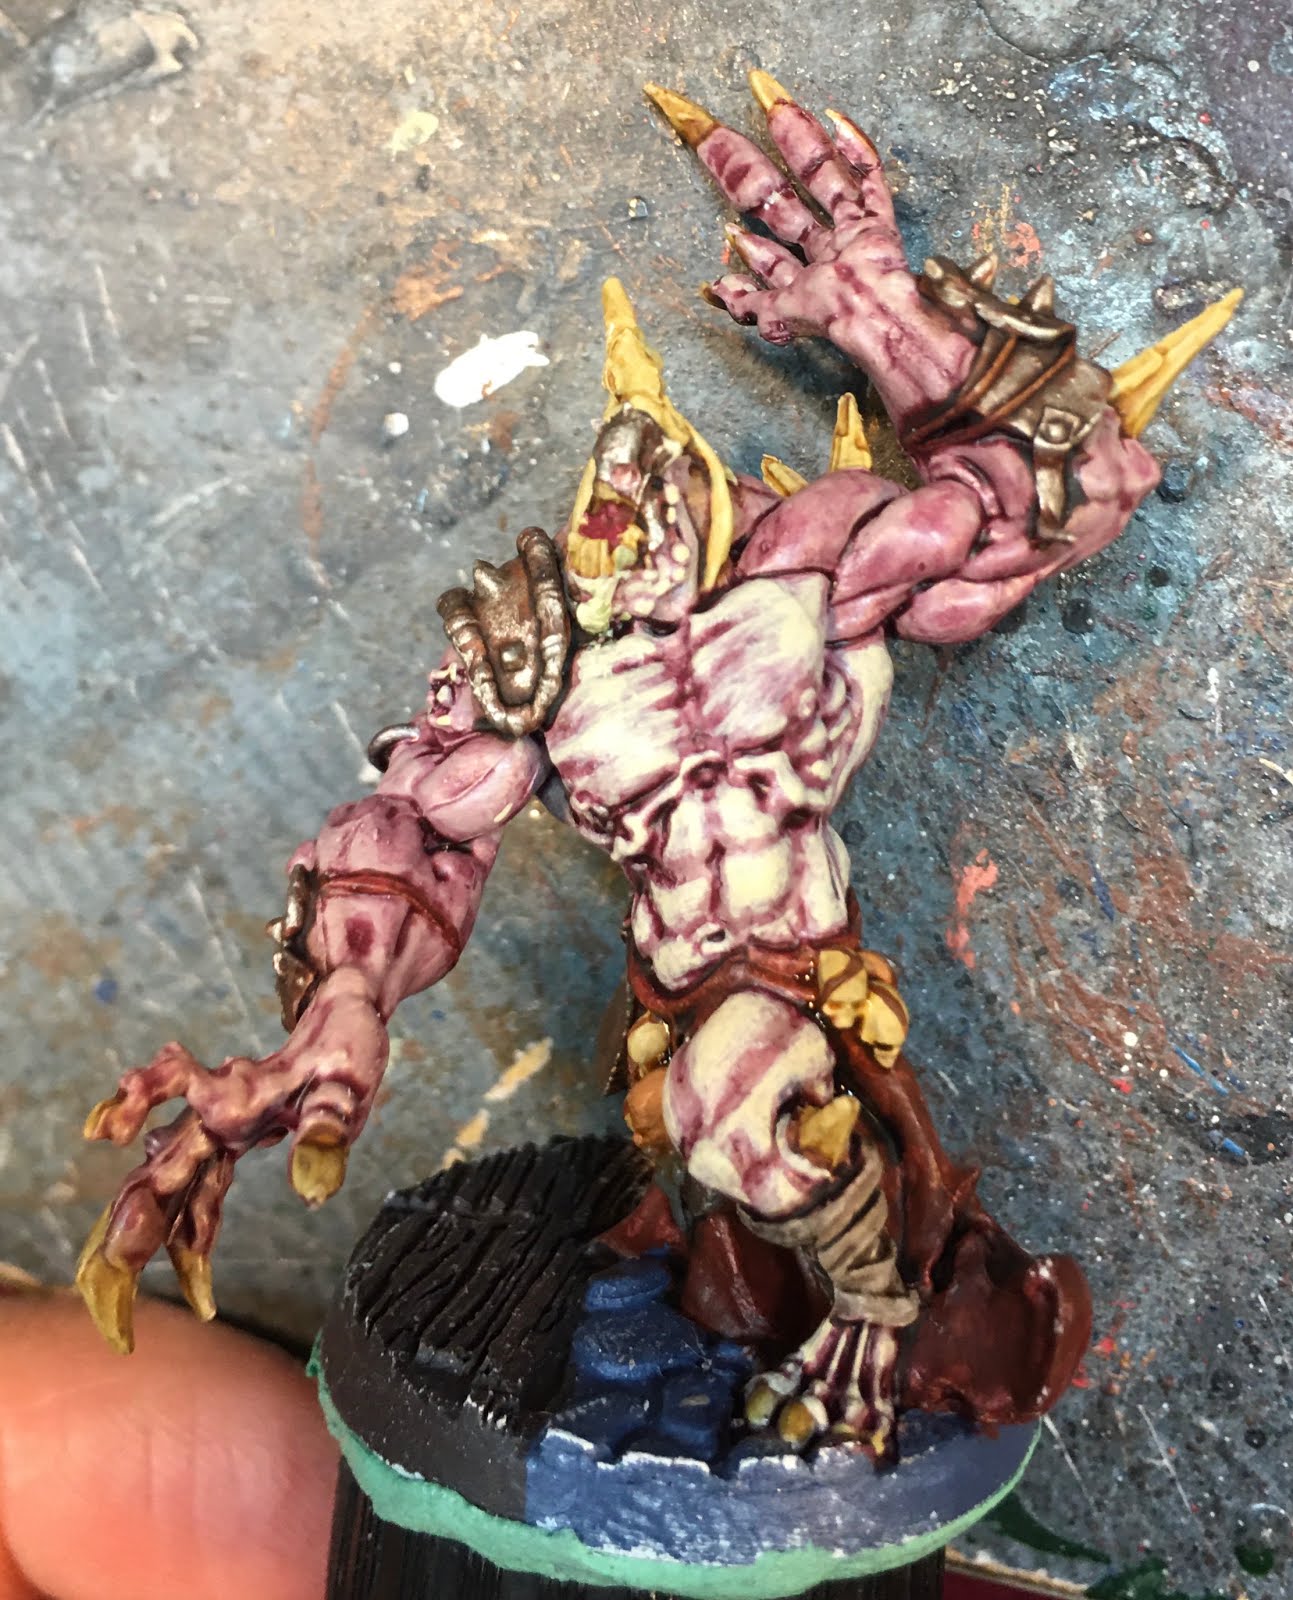
On The Table - Orc Abomination

I have wanted to paint an albino big monster for probably 2 years now but have not seen a technique that I liked or believed. GW has a recipe in their painting app for Pale Flesh (that looks more like parchment than skin) and Varicose Flesh (that looked a little too pink for me. Initially I wanted to try the Pale Flesh variant as I was trying to paint pale... flesh but it called for being shaded with Reikland Fleshshade. At the last moment I decided that is going to look too natural and I wanted something more pink. Varicose Flesh starts with Rakarth Flesh and to be washed with Carroburg Crimson. I was still skeptical but through I could always strip it if it looked stupid.

After washing I did think I looked stupid but pressed on anyway.

The recipe then called for Flayed One Flesh followed by Pallid Wytch Flesh. I did a test patch and didn't hate it so pressed on.

The more I painted the more I liked it. It has good depth, shading and tone. It is also surprisingly hard to mess up. Everything that is not streaky paint looks great. It fades and feathers nice. Even stippling does not look out of place. I aint even done the next stage of highlights.

If I had to do things over, I might go easier on the red shade. This is going to be my go to when I get around to doing my Ork Warboss.

Update:

I finished the Albino-Abomination and it turned out great. Next time I am going to go a little easier on the shading as it is overly dark for me.

I am especially proud of the eyes. I used solid Wazdakka Red for the pupils.

Further Update:

I tried the "pale flesh" recipe on a spare Abomination for Black Plague and it makes me glad I chose the other style. All told it is pretty solid slightly pale caucazoid flesh. It really lacked a variety in tone so I had to use some Carroburg Crimson in the deep parts. It might be good for speed painting lots of bare chests or bare arms, but it is no good for large patches of bare skin or faces.

It comes off pale but not albino. Now I have this pasty, naked mole rat of an Abomination in my box but at least I know now.

Tuesday, April 14, 2020

Finished - Ossunilur Broadpike (D&D mini)

My regular D&D group of years is on hiatus due to the COVID-19 pandemic but I finished the mini for it. Blogging should be up but it is not. It is hard to stay motivated on lockdown. Despite that, lots has been finished since the last entry. Just have to write about it.

For modeling, I swapped the dagger in the left hand for a hammer from WFB and shaved off some of the Chaos icons. The belt scabbard was empty, presumably with the dagger that was in the left hand, so I replaced it with a cut down hilt from a plastic weapon. I built the base up with some shale flakes and sand.

Painting was pretty standard. Black, gold and silver were painted in my standard "base, wash, touch-up, highlight" style. I did an extra blue wash on the hammer to make it look magical. I washed some of the gold with Agrax Earthshade rather than Gryphonne Sepia to make it look older.

Buckle up for some "let me tell you about my character" below.

I started with the idea of a character whose actions were at odds with his stereotypical racial background. I dismissed the idea of a demi-human passing for human (especially the very trite surface-Drow that is done to death) as that would require lots of racial intolerance to be built into the GM's world. Most D&D games function in a race-blind world where gnomes, half-orcs, elves and humans all get along for the most part and are subject to much prejudice. The "go along to get along" mentality is high.